Real time remote diagnostic
1. Connect to the Scanner
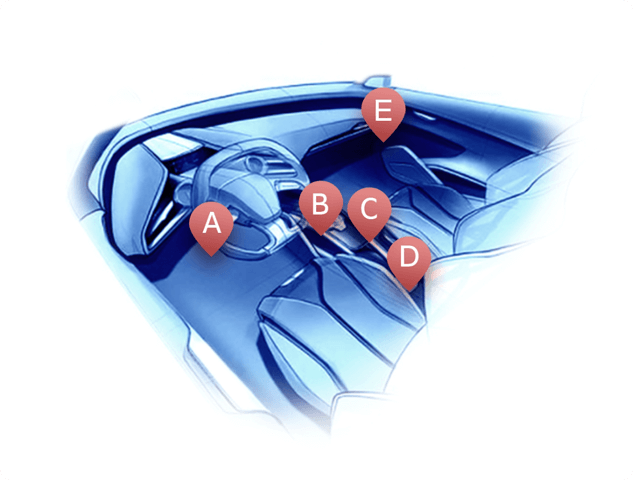
No matter you bought the Thinkcar 1 or Thinkcar 1S, the ways to connect to the Thinkcar APP are the same. The first step is to plug the scanner to OBD port of your vehicle. The positions of the OBD port might be different from different vehicles, please find the port according to the following picture.
After plugging the scanner in, the indicator light will turn red which means the scanner is connected and ready to connect the phone.
2. Select Real Time Remote Diagnostic Function
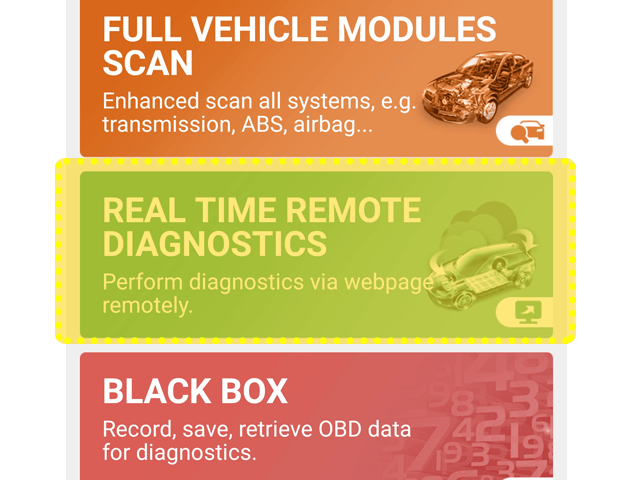
After connecting to the devices successfully, select the green area on the "Scan" page to enable the Real Time Remote Diagnostics function.
After entering the page, there will be a page which introduces the Real Time Remote Diagnostics function. To use this function, you will need help from a mechanic. The mechanic you contacted to should open our official website "www.mythinkcar.com" and select "Real Time Remote Diagnose" to diagnose your even you are far away at home.

Select "Real Time Remote Diagnose" to continue.
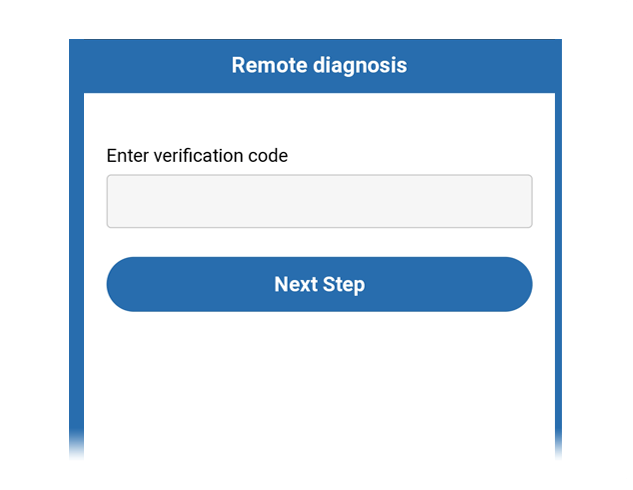
3. Get a Verification Code
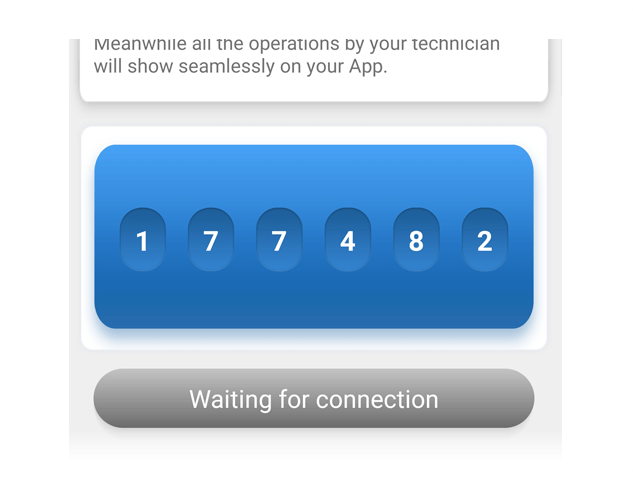
To continue, select "start" to get the verification code and let the mechanic know the code.
4. Mechanic Starts to Remote Diagnosis
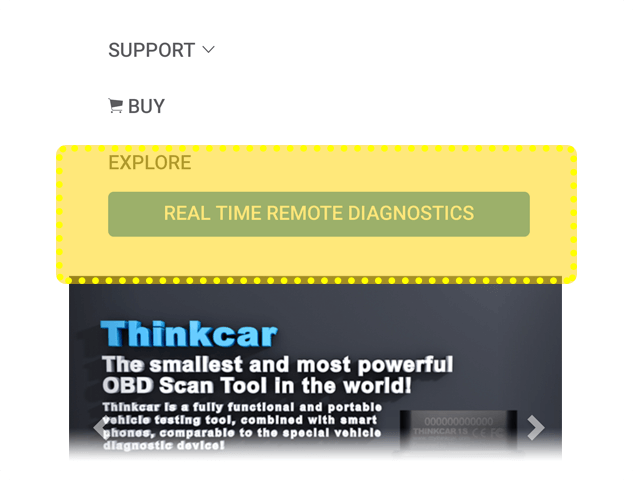
Here’s a tutorial for your mechanics: Open the official website: "www.mythinkcar.com", select " Real Time Remote Diagnose" to continue the next step.
Input the verification code, click to the next step to remote diagnosis.
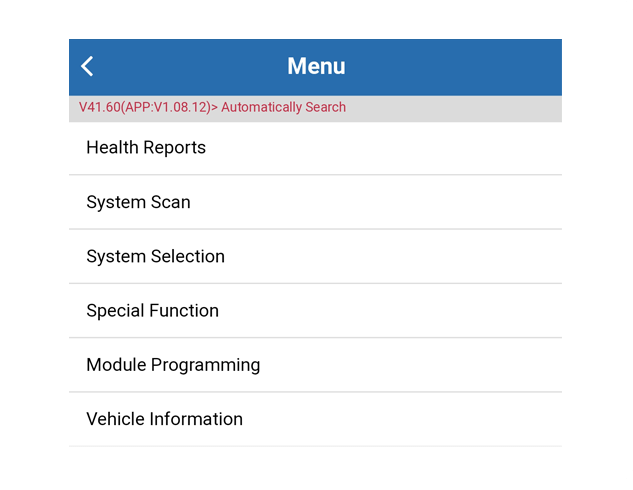
Mechanics only need to select the system that needs to be checked.Thinkcar supports: Special Functions, Read/Clear Fault Code, Action Test, Generates Diagnostic Report and check the data stream, etc.
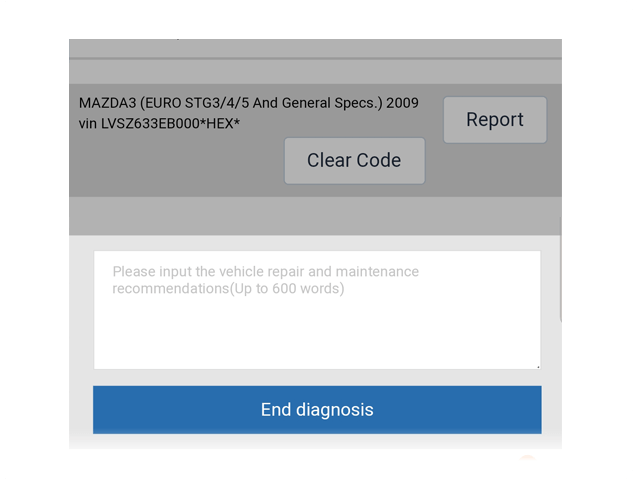
After the diagnosis finished, mechanic can provide you some repair suggestions. You could check the suggestions and the total report after generating.